
Matt's Awesome Stuff
Anowelder
Last updated: 16Apr2012
What is an "anowelder?" A hybrid that combines both an anodizer and a spot welder into the same device. Before you start thinking why anyone would want to do this, stop. You wouldn't. It's like making a hammer with a screwdriver tip at the head (hrm...). I can say with near certainty I am the only one in the world to make one.
Why did I make one? Well it started off in 2010 with me making an anodizer as a gift to a chainmailler who couldn't afford one ($100-$250). The anodizer needed a case, a spare PC power supply was the closest thing I had on hand, and I noticed I had just enough extra space inside for a fist-sized transformer. Another thing chainmaillers sometimes want is a spot welder to weld rings. So, she asked for neither and got both! Actually, she lived in an apartment so, less clutter was better.
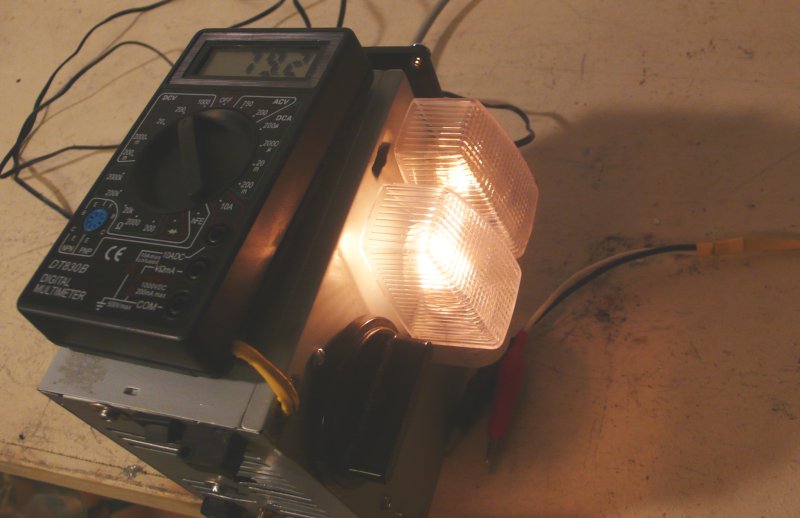

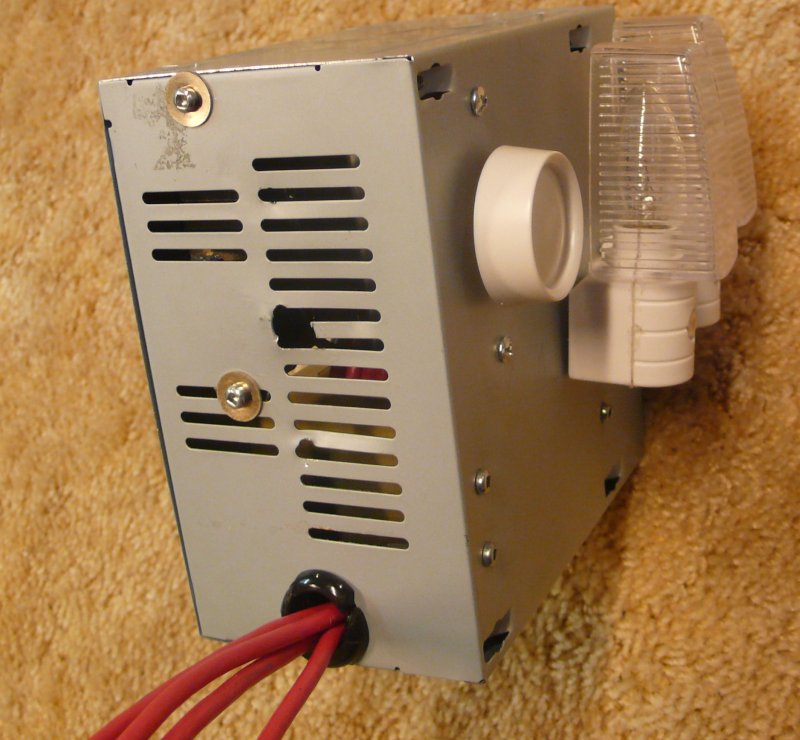
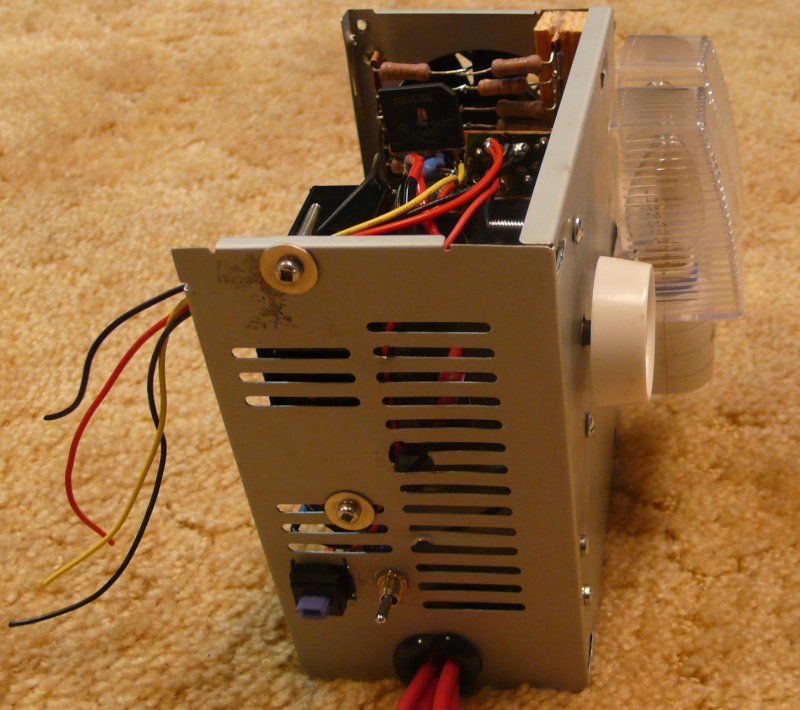
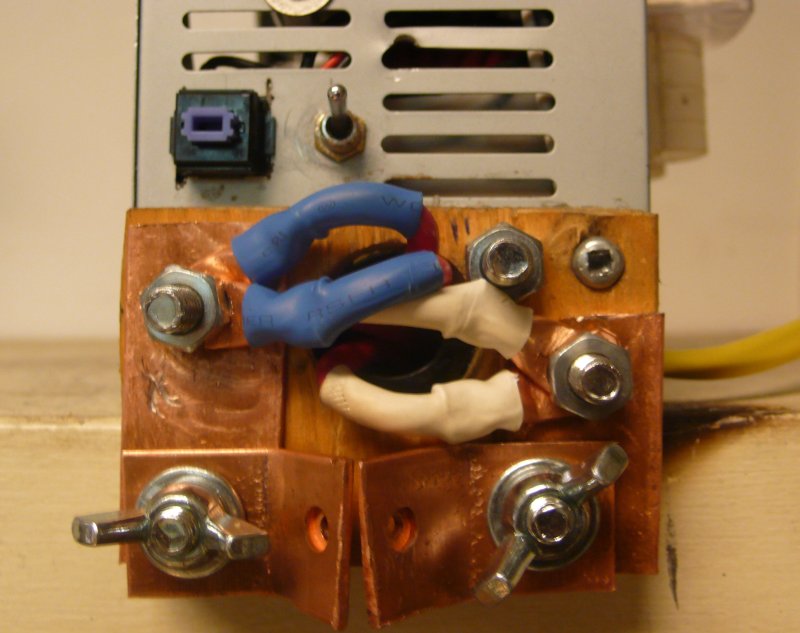
For anodizing: You turn it on, clip your gator leads on to the stainless sheet in the anodizing bath (water + salt/baking soda/tsp/whatever), the other to the item you're anodizing, twist the dial and read the voltage on the multimeter, and then press and hold the thumbswitch up top to energize the leads. Or, if braver, flick the rocker switch next to it to turn it on all the time.
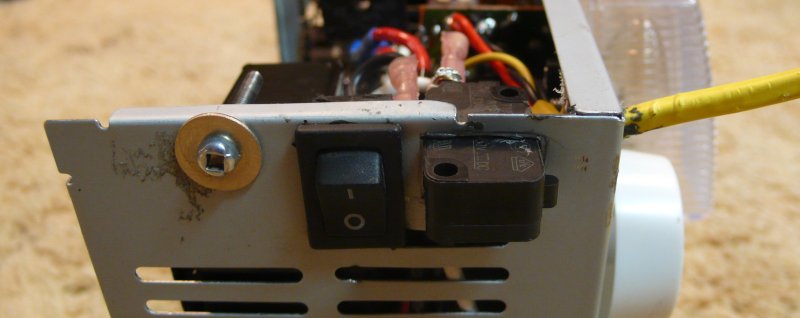
For welding: You press your ring against the two copper electrodes and tap or hold the blue button. Alternatively, step on the food pedal (plugs into the back). If the toggle switch is down, the welder has 100% power all the time. If the toggle switch is up, the welder input power goes through the anodizer supply (so you could dial 0-100% to slow the welding down and give more fine control).
Total cost was around $15. $5 for the multimeter, $6 for the dimmer, $1 for each of the night lights, and a couple bucks for the bolts. The rest was junk.
Theory:
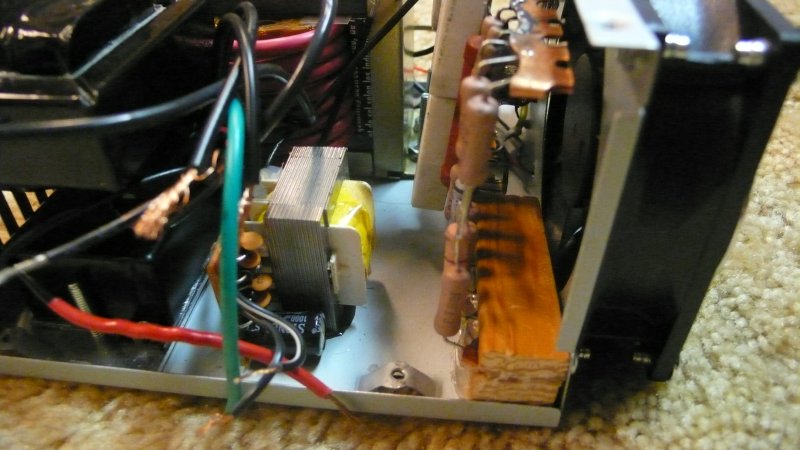
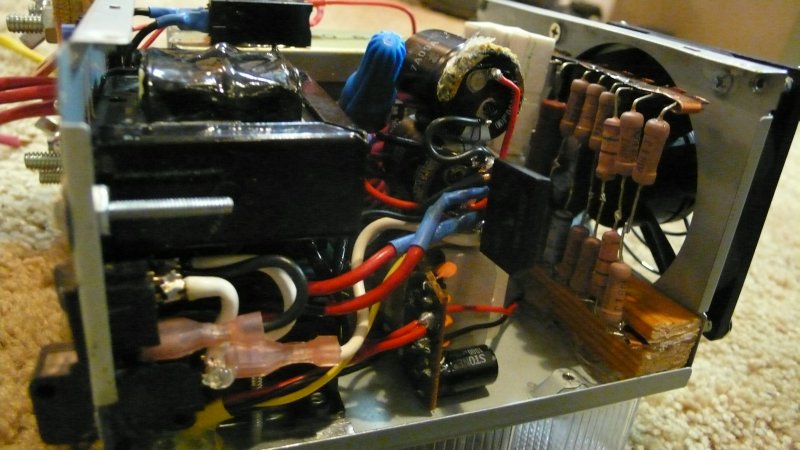
An anodizer is just a variable 0-120VDC (or higher) power supply. The cheap and dirty way to do that is with a light dimmer and then convert the AC to DC with a rectifier and smoothing capacitor. But a light dimmer gets confused and starts tripping out (flicking, not shutting off, killing itself) if there's not a normal, steady resistive load (like a lightbulb) attached to it.
So, there are 2 miniature nightlight lightbulbs, one before the DC one after, and a 50W resistor bank that just wastes heat providing a steadier load. The nightlights serve as a visual indicator of the power being on, as well as to drain the capacitor down when turning the dial down. The dial is not a reliable indicator of voltage, so there's a hardwired multimeter to measure the actual voltage. Anodized color depends on voltage, so it's important to know what voltage you're getting. The voltage is isolated (making it safer) with a bathroom isolation transformer.
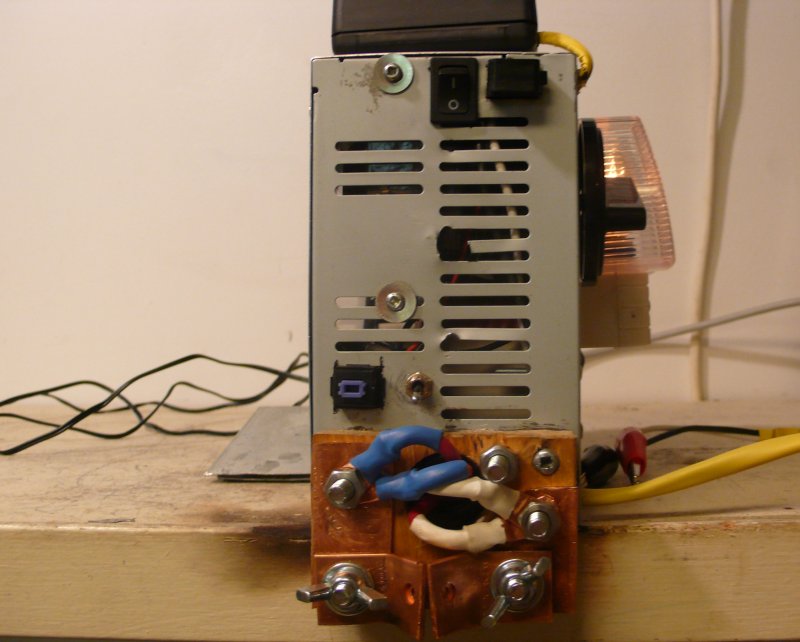
The spot welder is just a pair of 4 turn secondaries of heavy wire around the primary. This produces low voltage and high current. The switches control a relay which switches the input on or off. A fan out back pulls cool air from the front, over the transformer, past the resistor bank and out the back.
More is explained in both my Spot Welder and Anodizer build tutorials.
Construction Process:
~50W resistor bank:
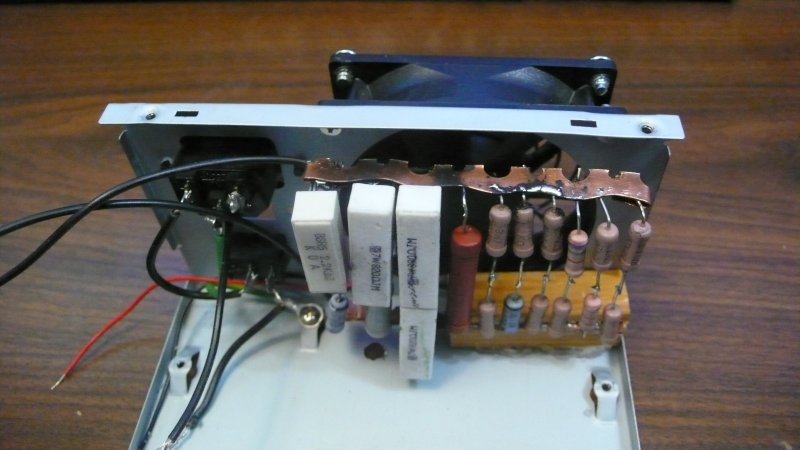
All of that could be replaced with a single resistor the proper size, but I was making this out of junk, so, that's what worked. There's a fan behind it to cool it down. Normally a 60W lightbulb would be used instead of two 7W lightbulbs and a resistor bank, but that was ugly, fragile, and bulky.
The night lights had to be gutted, as the light sensor (even covered with tape) was messing with the dimmer too, so I hardwired the bulbs directly.
Rough test-fitting:
Dimmer mounted:
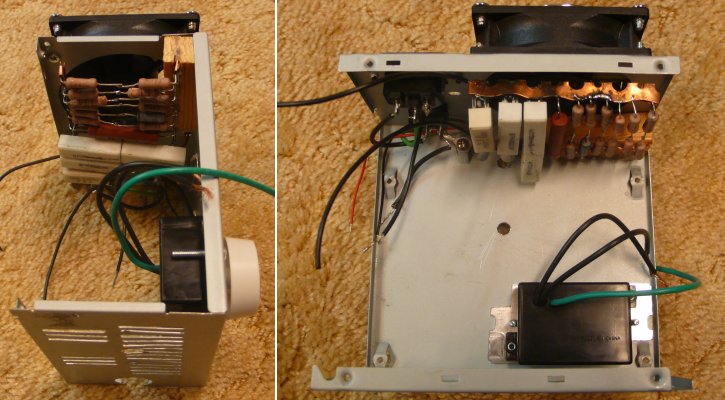
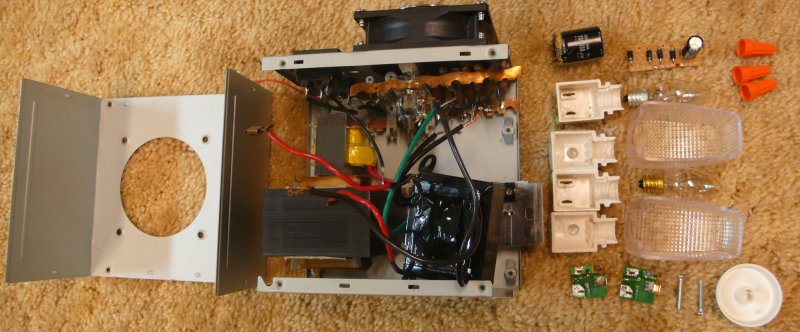
25W bathroom isolation transformer mounted, so she wouldn't kill herself if she screwed something up:
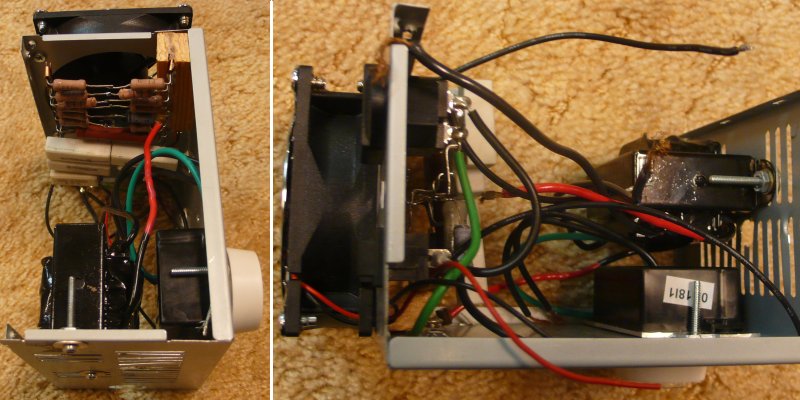
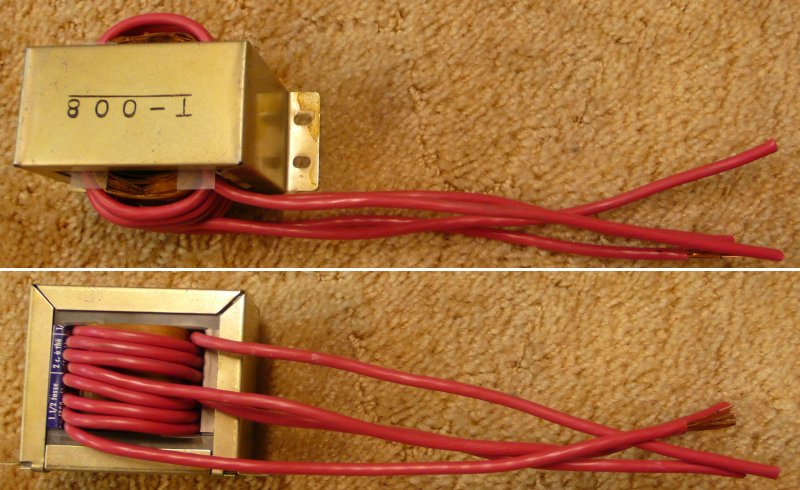
~300-400W audio transformer, 350 turn primary. I elected to put two 4-turn coils on it, not sure if 0.75V would be enough or if 1.5V would work better. That's a very tiny spot welder but it should be adequate:
Fits in like this:
Test fitting with the night lights:
9v control power supply (wallwart) for the DMM, relay, and fan:
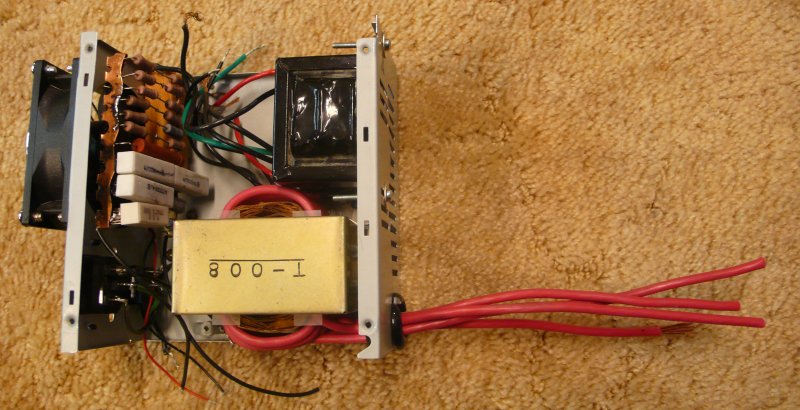
Cap and FWB added. Dimmer vs. 100% toggle, and momentary weld switch (old keyboard key) mounted:
Anodizer power switches, so power can be adjusted and metals lowered into the bath before energizing. Redundant momentary and rocker:
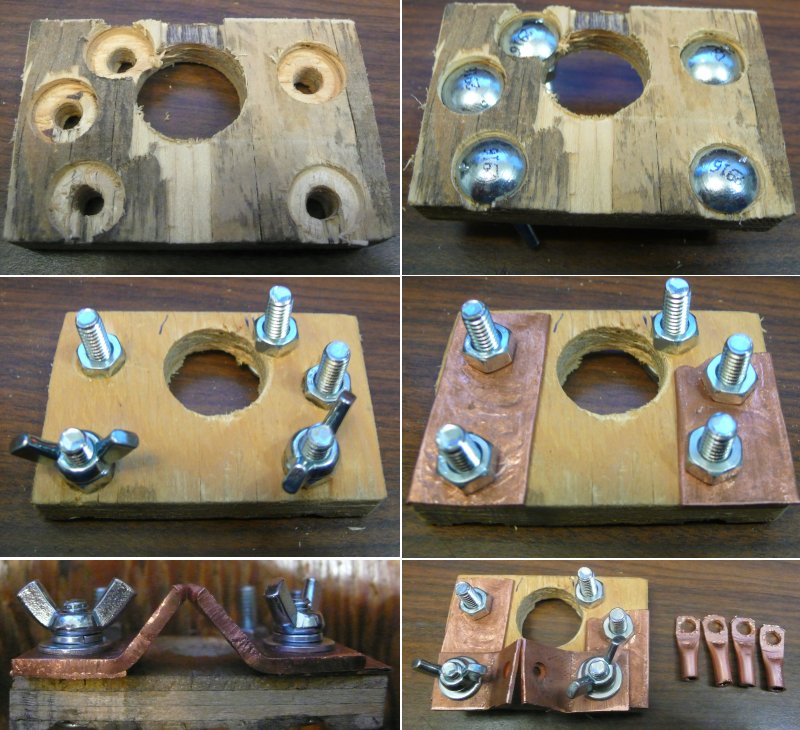
Putting my world-class woodworking and machining skills together. The two prongs are angled to accommodate a variety of ring sizes. Ring lugs made out of copper tubing. The extra post is when manually wiring the two coils in series instead:
Looks like this when it's done. I must be getting soft in my old age. I even added a fuse for christsakes. Relay on top:
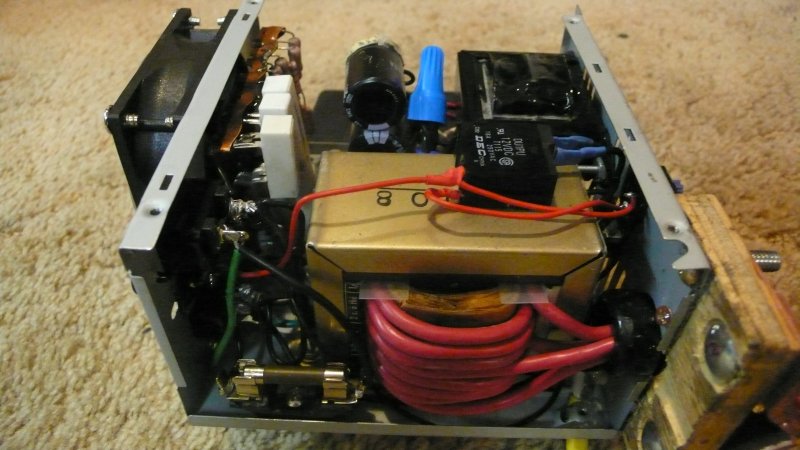
Other side:
Front of the welder part:
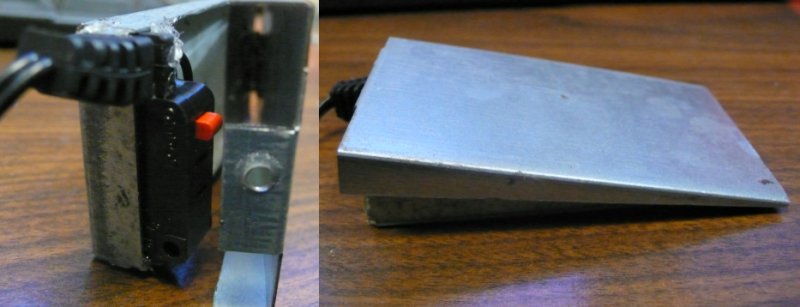
Foot pedal I made, redundant to the blue momentary switch (plugs into the back of the unit):
I keep underestimating the amount of time that assembly takes. Electronically.. couple minutes. Mounting everything and wiring it nicely.. days.
Came out okay by my standards. Hardly had to buy anything, used mostly scrap and junk. The 3/4" lip on the welding rig prevents it from sliding backwards when you push it. Stays nice and cool, I'm happy.
The anodizer part works great.
The welder part... didn't work well. The electrodes need to be filed to cup the rings better. It worked and melted other metal, just not reliably with rings. She doesn't have much use for welding yet, so as far as I know she's never got around to tweaking it to work better.